Monday, May 16, 2016

Play Kitchen Renovation

     We were so lucky when our neighbors decided to gift us with a play kitchen that they didn't need anymore! It was a nice, sturdy, wooden kitchen that had tons of potential for fun! Amelia loved it from the first day we put it in our house, but the decision to keep it in the living room, left me wanting it to match my style a little more. There was only one answer and that was to renovate!


     It was pretty cute from the get go, but with a few coats of paint and a little creativity, I turned it into this!


     The first order of business was to remove the cabinet faces and all of the hardware. Next, I spray painted all of the hardware with spray paint. I used Rust-Oleum in Antique Brass (2-3 cans). Then all of the cabinets and bases got two-three coats of white paint. If you have the time and patients, I would recommend sanding before painting. I didn't, but I know it would be greatly beneficial. I used an exterior white  semi-gloss paint. My reasoning for this, was that I thought it would be more resistant to water, scuffs, and stains, we shall see.


     After the white is good and dry (waiting between steps is the worst!), I used 1 inch painters tape to lay out where I wanted my white subway tile. I cut it into 3 inch long strips and laid it out in a brick pattern. After the entire back splash was covered, which is super time consuming, I used gray acrylic paint to 'grout' the tiles.


     Next came the faux marble countertop. My first step here, was putting down a fresh coat of white. This allowed me to blend in the gray really well. This was definitely a learning process, but what it really came down to was layers! I stared by adding the veining of the marble with a small brush. Then I blended lighter grey over that with a foam brush. Immediately add more white paint with the foam brush and keep layering until you get the desired effect. After mine dried, I dry brushed an extra layer of white over the top on the diagonal. This gave it a uniform look and made it seem like it had striations like you would see in stone.


     I also added eyes for the stove instead of painting them on. I did this by spray painting some wooded coasters we already had black. I would also suggest using cds or purchasing wooden rounds from the craft store. These were attached using Gorilla Glue.


     The square on the front of the oven is chalkboard paint, although she isn't old enough to use it yet, I'm sure she will have fun with it in the future.


     One of my favorite additions to the kitchen is the metal sheet I put on the fridge. I thought it would be fun for her to actually have magnets on her refrigerator. I bought a 6"x12" galvanized metal sign from Michael's. We drilled holes into the corners and mounted it on the door. She has love playing with the magnets and learning her animals! 


     I'm super happy with the way everything turned out. The project took me about 2 days to complete and you have to be committed to get it finished that quickly! I had my husband watching the baby the whole time, so if you've got to watch your kids as well, it could take much longer. 

     I think, as with anything you do, the attention to detail really makes it. I would recommend looking at real kitchen renovations, picking out what you like, and scaling it down. If you aren't into faux painting, there are plenty of options, from contact paper to furniture appliques. You really just have to get out there to the stores and look for inspiration. Although, I will say, faux is the cheapest way to go! 

Here is what I used for this project:

1 Gallon of White Paint
3 Bottles of Brass Spray Paint
Black Spray Paint (or  any black paint on hand)
Chalkboard Paint (very small amount)
Gray Acrylic Paint
1" Painter's Tape
4 Coasters or Cds
Gorilla Glue
2 Small Foam Rollers
2-3 Foam Brushes
1 Angled Paint Brush (3 inches or so)
Paint Stirrers 
Galvanized Metal Panel
Drill
Screwdriver
4 Small Screws

Monday, April 18, 2016

Rustic Clip Frame


First and foremost, Jeremy and I have no idea how to build anything. We aren't the handiest people on the planet, but I really wanted a frame to go over our bed. I also didn't want to pay a fortune for it. Frames this size are pretty expensive. And, we already had some really cheap wood from a previous project that I wasn't a huge fan of.

We tore that old project up and went to work putting this together. We don't have many tools and definitely not technical skill, which is why this is a "rustic" project. I feel like most people use the word rustic to mean "I just left it rough around the edges instead of really trying." Whatever works! I like the style of most rustic projects.


This frame is 28" x 68" and fits nicely above our king  size bed! We had them cut the boards at Home Depot when we bought them. They charge per cut, but it is cheaper than buying a saw for sure, especially if you don't do this sort of thing often! I'm not going to give you guys instructions, because I wouldn't even know how! Just wanted to share our little project and maybe give you guys a bit of inspiration.


     The beautiful artwork that we built this specifically to display is by Nashville based artist, Kelly Mckernan. Please, please, go check out her work on her website or her Facebook!

Sunday, April 17, 2016

Quick Italian Salad


We love this "Italian" salad! It is absolutely on of our favorite meals and it is so easy to put together.
I feel like salads don't really need recipes, just a list of ingredients that you put together according to what you like the most and how many you are serving. So, here is what we throw into ours!

My addition that isn't exactly in the norm, is fried onion straws. In my house, we aren't a huge fan of raw onions. So, I replace what would normally be diced red onions, with the fried variety. I really like it because it adds a nice crunch to the salad and they are so yummy anyway! 

Quick Italian Salad

  • Italian Salad Mix, Romaine and Radicchio
  • Tomato, diced
  • Cucumber, diced
  • Kalamata  Olives, sliced
  • Delicatessen Style Peperoncini or Banana Peppers, diced
  • Crumbled Feta Cheese
  • Fried Onions Strings
  • Fat Free Italian Dressing
  • Salt and Pepper, to taste
Mix it all together and eat up! I usually make garlic bread, with whatever bread we have lying around, to make this more of a meal. And, Jeremy loves having the bread for sure! I think it makes up for not having meat in the salad. If you want to add meat, we have done this with grilled chicken or even diced salami and pepperoni! 

Monday, April 4, 2016

Easter in Alabama


We were so excited that we got to go home for Easter. It isn't very often that we can make that trek for a holiday. Most holidays Jeremy either has to work or only has 1 day off. We managed to get 4 vacation days and spend TWO whole days at home. Although it doesn't sound like much, it was great to spend Easter with out family and friends!

I thought the driving (in my case, riding) was going to overpower the trip, but this time it wasn't so bad. Amelia slept most of the way and kept herself fairly entertained while she was awake. She snack a lot and played with her toys. She did great and only fussed a couple of times.


Taking a little mini vacation like this is a great refresher. Which, Jeremy and I need fairly often. We get sort of bogged down with our responsibilities and the monotony of the day to day. We combat this weekly by trying to explore the area around us and go for some pretty long walks. It just doesn't give the same amount of satisfaction as a road trip. I love exploring new places, but lately, going home has been the best. It is an adventure in itself, because Amelia is always learning something new. I love to see things through her eyes. There is a lot to explore in Grandcam's yard, rocks to find and flowers to pick!


She did a good job 'hunting' for Easter eggs. She figured out pretty quick that they needed to go into the basket, but then she wanted everyone else to pick them up for her. It was extremely cute and she had a blast, running and rolling around in the grass. Since she was the only kid there, it was all about her. And, she was totally okay with that!


Sunday, March 20, 2016

Back Online

I'm glad to be getting this up and going again. Our "old" computer, wasn't making the cut and we had to take it back after having it for almost a year. We bought the coverage on it and although it was a hassle, ultimately everything worked out. So, I'm writing this blog from our new Surface 3. I have only had it for a few days, but I already am having a wonderful time with it.

I am going to be able to start blogging again, which I am really looking forward to. I'll be able to use Lightroom and Photoshop again, which is a definite plus. And, the most amazing thing of all, is that I can draw straight onto the screen. This is something that I have been wanting to do for a long time. I have played around in Photoshop for a long time, but I am going to be able to seriously do some digital art. I'm so excited!

I worked on my first drawing for roughly 3 hours yesterday. It took me quite a while to figure out how I wanted everything layered, but I'm super happy with the end result. I can't wait to learn more techniques and hone my skills.


We are heading home for a mini vacation next weekend. Amelia will be getting to spend Easter with her grandparents! You can be sure that there will be a blog about our trip home.

I am also about to undertake a play kitchen remodel. Details on that will be posted periodically. I do so enjoy my projects and this should be a great one!

Friday, February 26, 2016

Creating Inspiration


I have the hardest time keeping myself inspired to create. I feel like this is something that a lot of artists struggle with. I can't even tell you how many times a week I get everything out to start working, stare at the paper for five minutes, and put everything away. It can be really tough to have this happen over and over again. If you are a creative type, I'm sure you can relate to this sort of frustration.

I came to a realization the other day though. Sitting around and just hoping for my muse to hand me a completed work wasn't going to get me anywhere. It takes actually sitting down and getting started. You have to put in the effort to get going and by doing so, you can create your own inspiration.

I put Amelia in her chair and gave her some art supplies. She got straight to work on her beautiful scribbles and I got to work on mine. I put pencil to paper and before I knew it, I had the entire under-drawing completed.

I had no vision for the piece when I started, although I do have an underlying theme in almost all of my work. Each little part of the sketch led to the next and then I hit a block.  I had a wide expanse of negative space and I had no ideas. And the best advice I can give when this happens is to walk away. Leave the piece unfinished, shut it up in your sketchbook and forget about it for awhile. Coming back to a drawing with "new eyes" is the best thing you can do. I do this also when I am not liking a picture. Often times, when revisited, it isn't as bad or as hopeless as originally thought.I hope I can take my own advice on these things in the future. Always, always try.

I am still learning to watercolor, so the rest of the process was a bit touch and go. I decided to texture all of that negative space. I used a dropper and rubbing alcohol to get a texture I like. I'm honestly super happy with the way it all turned out. The last step in my process involves going back over the painting in marker, to bring out my lines.

If I had never taken it upon myself to get inspired, I would have never created this. I think that would have been a real shame.

Monday, February 8, 2016

Jacksonville Zoo and Gardens


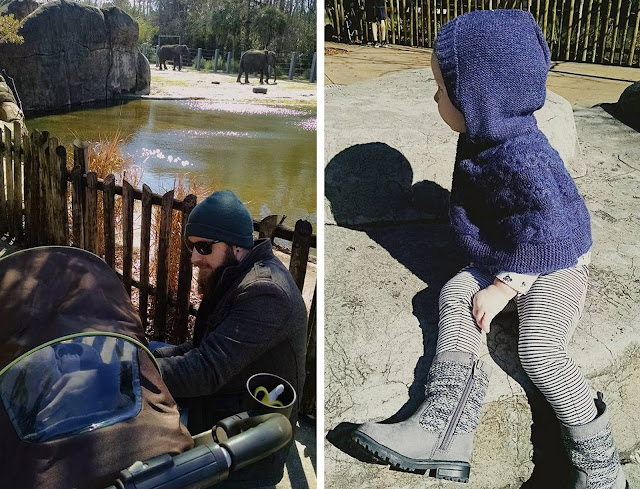
     We took Amelia to the zoo to see the animals for the first time yesterday! We had taken her to the Jacksonville Zoo and Gardens last Halloween, but none of the animals were really out at night. She really enjoyed looking at everything and spending time outdoors, as did we, even if it was chilly!


     She did really great in and out of her stroller! That's a really surprising statement considering she has always hated to be strapped into that thing. We took her out a couple times to see things where the fences were too tall, but she spent almost all day in there. The zoo was really stroller friendly for the most part, not that it wasn't a workout.


     Now, about the zoo itself. They house over 2,000 wild and exotic animals and over 1,000 types of plants. Some of the larger exhibits include The Range of the Jaguar, Land of the Tiger, Giraffe Outlook, and the Great Apes. The zoo is essentially a safari covering East Africa, Asia, Australia, and more! They have great exhibits on Florida wildlife, amphibians, and birds. Many of the animals were put up during our visit because it was too cold out for them, but we had a great time seeing the ones that were still in their habitats.


     The gardens are beautiful! Many of the plants were actually in bloom, which was a pleasant surprise in February. The Butterfly Hollow is a seasonal exhibit, but the paths through it lead to a beautiful view of the Trout River. There is seating scattered throughout the garden and it was absolutely a lovely space late in the afternoon!


     Another point I would like to hit on is the food. They have pretty standard and yummy fare at their cafes, but their sweet shop is fantastic! They have absolutely amazing fudge, ice cream, and a huge selection of candy. Their fudge is so good that Jeremy actually convinced me to buy this much of it! They have lots of different flavors. We got Rocky Road, Birthday Cake, Heath, Cappuccino, Dulce De Leche, and Butterfinger. He swears it take us a along time to eat it all, but I'm already doubting that!

     We had a great day! It is an absolutely beautiful and fun zoo and we will definitely be making a return visit in the future.